


Shopify Sitemap: Find & Submit Your XML Sitemap to Google
This article is Chapter 4.5 of our 288-page Shopify SEO guide.
Check out the full eBook.Your sitemap is an essential, but fairly easy part of SEO for your Shopify website.
Thankfully, it’s built into Shopify and there’s almost nothing to do. The keyword being “almost”. If you do absolutely nothing, you may run into problems.
In this guide, we’ll cover all the fundamentals of sitemaps on Shopify and how to optimise it for SEO.
What is a Shopify Sitemap?
A Shopify Sitemap is an XML file that search engines use to find all the webpages on your website. Shopify automatically generates and updates your sitemap to contain links to your products, collections, blog pages, and other marketing pages.
Where is my sitemap on Shopify?
You can find your sitemap simply by adding /sitemap.xml to your website.
For example: yourwebsite.com/sitemap.xml
What’s in my Shopify Sitemap?
The Shopify sitemap is automatically created with parent and child sitemaps, depending on the size of your website.
Sitemap Index File
The first sitemap you’ll see is the parent sitemap aka index file. This is the main /sitemap.xml file, which links to all the secondary i.e. child sitemaps.
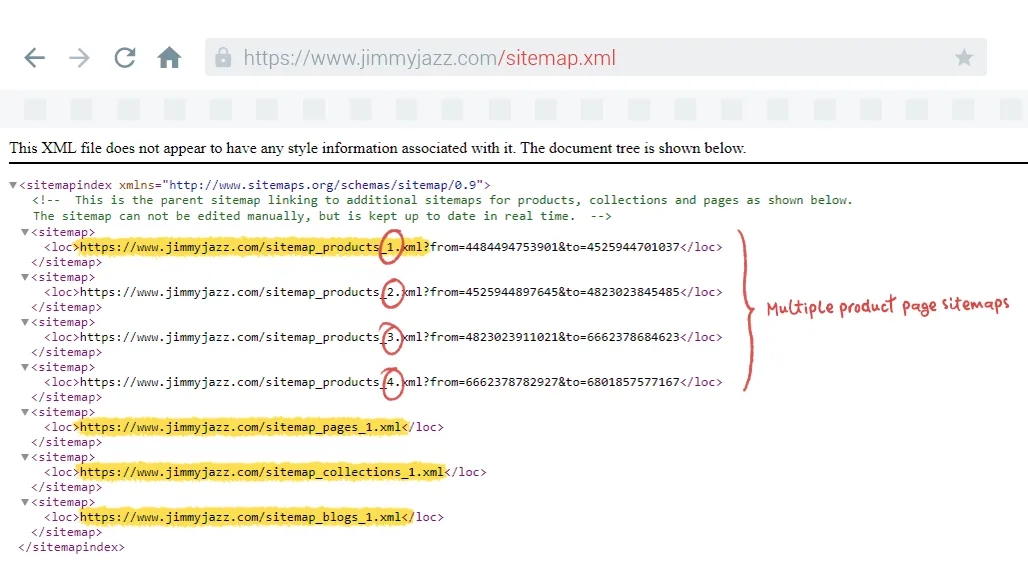
You should see the following links:
- Product Pages
sitemap_products_1.xml - Collections
sitemap_collections_1.xml - Blog Posts
sitemap_blogs_1.xml - Pages
sitemap_pages_1.xml
It’s also possible to have multiple product page sitemaps i.e. sitemap_products_2.xml, sitemap_products_3.xml, sitemap_products_4.xml, etc.
Shopify has a limit of 5,000 pages per sitemap. If you hit that limit, they’ll automatically create a new collection. Hence, big stores may have several product sitemaps.
Child Sitemap File
Opening any of the index file links will take you to a child sitemap containing links to all your pages, along with other details.
Within them, you’ll find information like:
<url>: The URL of the page<lastmod>: The last modification date of the page<changefreq>: An estimation of how often the page is likely to be changed<image:loc>: The featured image of that page e.g. main product image<image:title>: The title of the page the image is on
Here’s a real world example for collection pages:
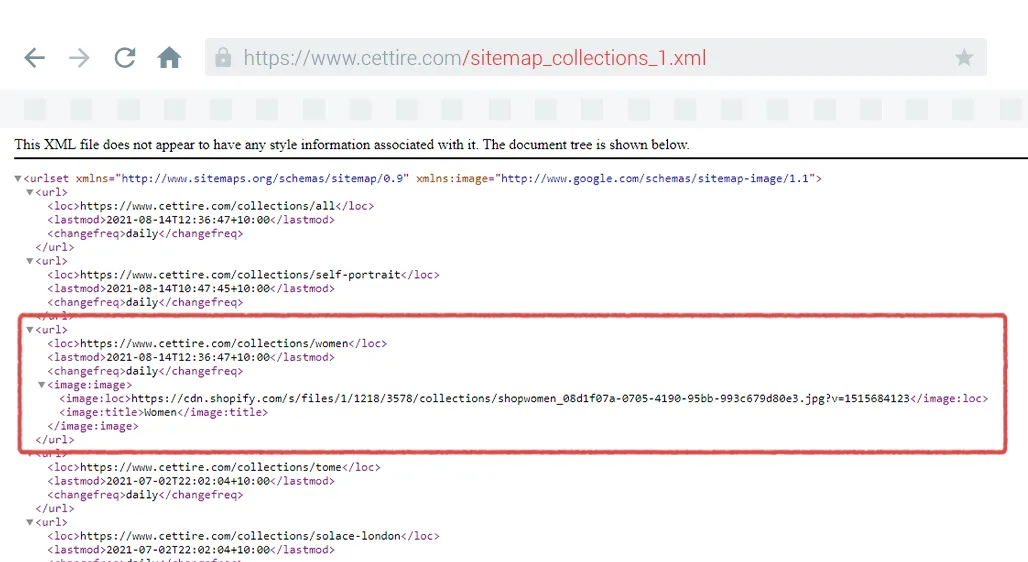
These sitemaps give a list of all your pages to search engines to make finding and crawling them easier.
How do I edit my sitemap on Shopify?
You kinda can’t, let me explain:
You can’t easily add a new sitemap, without a bit of a hack.
And you can’t add pages to the existing sitemap.
This is an automatically generated file, which has its upsides - there’s no need to manually add or remove pages every time you update the website.
The downside is the severe lack of control.
Thankfully, there is one thing you can control:
Removing pages from the sitemap, well, with a little coding.
How can you remove pages from a sitemap in Shopify?
While it’s barely talked about, there’s a hidden field that allows you to remove pages from the Shopify sitemap.
It’s a meta field named seo.hidden.
You can find it and modify it for product pages here:
https://YOURSTORE.myshopify.com/admin/bulk?resource_name=Product&edit=metafields.seo.hiddenOr collection pages:
https://YOURSTORE.myshopify.com/admin/bulk?resource_name=Collection&edit=metafields.seo.hiddenSetting this to 1 triggers 3 actions:
- It removes the page from the sitemap
- It sets the page to
noindex(a request to search engines to not add this page to their results) - It sets the page to
nofollow(a request to search engines to not follow links on this page)
The first action is perfect, the latter two, not so much.
To explain, let’s interrupt this tutorial with a quick lesson.
Why should you remove a page from the sitemap?
- The page is set to
noindex(as this conflicts with being in the sitemap, which is essentially a request to find and index the page) - The page is
canonicalisedi.e. a duplicate of another page (as this, again, conflicts with it being in the sitemap same asnoindex)
The problem then is Shopify forcing noindex, nofollow on the page because they’re both optional. You may or may not want it to be noindex, it could also be canonicalised. And you may or may not want links to be nofollow, most likely not.
Thankfully, this can be cleaned up with a bit of code. Ideally a developer should do this.
Simply navigate to theme.liquid and replace {{ content_for_header }} with:
{% capture content_for_header_fixed %}
{{ content_for_header }}
{% endcapture %}

{% if product.metafields.seo.hidden == 1 or collection.metafields.seo.hidden == 1 %}
    {{ content_for_header_fixed | remove: '<meta name="robots" content="noindex,nofollow">' }}
{% else %}
{{ content_for_header }}
{% endif %}
Problem solved. You can now edit the seo.hidden metafield to remove pages from sitemap, then manually set them to noindex * or canonical in another way as per our Shopify Technical SEO tutorial. To restore any page to the sitemap, simply clear the field.
How do I create a sitemap for Shopify?
There’s only 2 reasons I imagine you’d want to do this:
- Moving from another eCommerce platform - Google recommends uploading the old sitemap to make crawling easier
- Creating an image sitemap
The latter is probably easier with an app to save you needing to repeatedly update it.
As for the first one, it’s kind of possible, with a hack:
- Start by saving a copy of your old sitemap file or creating a new one with a tool like Screaming Frog. Name this file
old_sitemap.xml. - From your Shopify Dashboard, go to Settings > Files, then upload the
old_sitemap.xmlfile. Once uploaded, it’ll give you a URL beginning withhttps://cdn.shopify.com/s/files/. Save this for later. - Go to Online Store > Navigation > URL Redirects and create a redirect from
/old_sitemap.xmlto the file URL in step 2. - Double check it worked by opening
yourwebsite.com/old_sitemap.xml - If so, submit this sitemap in Google Search Console. It may take a few resubmissions to work, but you’ll know it worked when it says “Success”.
That’s it, now Google will easily be able to crawl all your old URLs and see they’ve been redirected to new ones.
How Do I Submit My Shopify Sitemap To Google Search Console?
Setting Up Google Search Console
First, you need to verify your store with GSC. If you have already done this, skip to the next step.
Head to Google Search Console, then log into your Google account. You should see something like this:
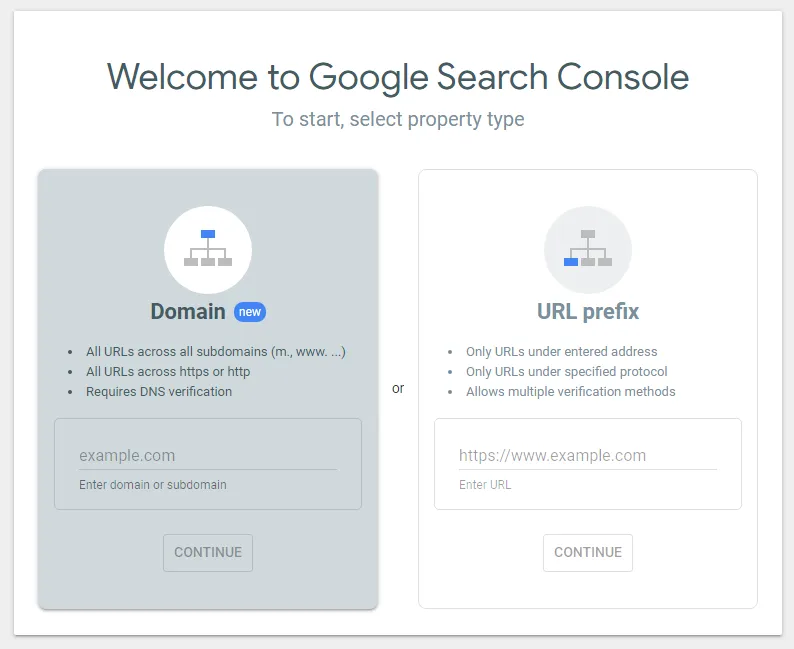
You can either verify your site with a .txt record (Domain) or with an HTML Tag (URL prefix). I recommend the former.
In the “Enter domain or subdomain” field, write down your store domain. Google will show you a custom .txt code to add into your DNS configuration.
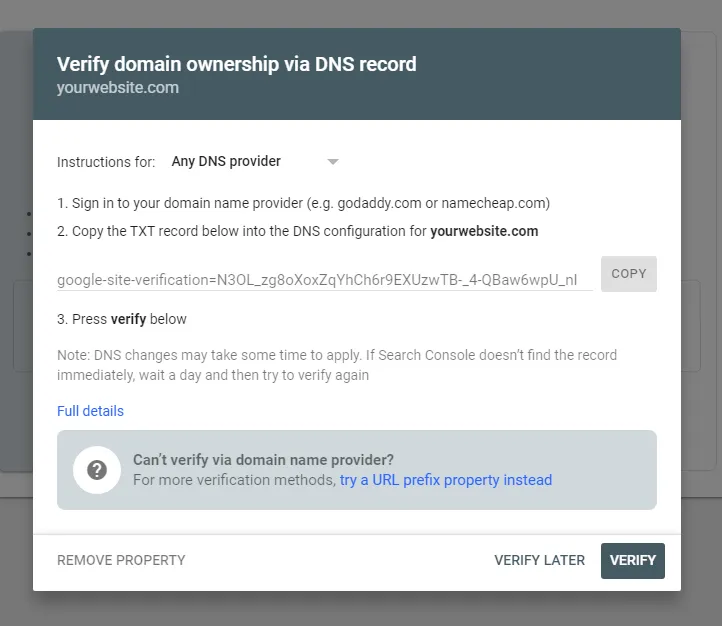
Select your domain name provider in the drop down menu, then follow the instructions to authorise Google to access your DNS account. If your DNS provider isn’t on this page, check this list of hosts out.
Your domain should now be verified and you can use Google Search Console.
Submit Shopify Sitemap
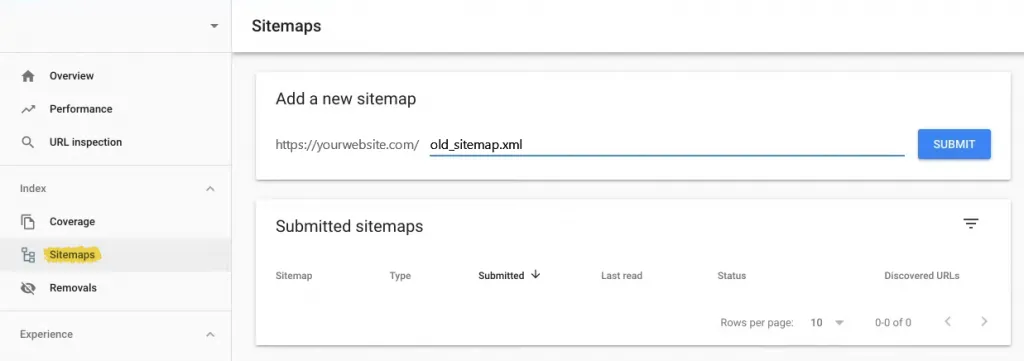
- Log into Google Search Console.
- In the sidebar, navigate to Index > Sitemaps.
- Under the Add a new sitemap form, enter your sitemap file name i.e.
/old_sitemap.xml. - Click the blue Submit button. After a few seconds, you should see “Sitemap submitted successfully”.
If Google throws you an error message, make sure your sitemap URL is formatted correctly.
Google Search Console Sitemap Errors
You’ve submitted your sitemap to GSC, but it’s not working, here’s two common issues we come across and how to fix them.
Couldn’t Fetch The Sitemap
This is frustratingly a very vague problem, so it’s quite hard to diagnose.
Make sure your sitemap URL is correct and you’ve set up Google Search Console under the right URL. I’d recommend using your root domain - and definitely not your myshopify.com URL.
If nothing else, try resubmit it a few times.
”Indexed, not submitted in sitemap”
Sometimes your sitemap will submit successfully, but a deeper dive into the Index Coverage Report will reveal lots of URLs that say “indexed, not submitted in sitemap”.
Is this a problem?
Probably not. As long as you’ve not manually removed pages from the sitemap that aren’t noindexed or canonicalised, then it’s probably a few common issues.
These are:
- False Positives. Sometimes this report makes mistakes and the pages are in the sitemap.
- Pagination. Pagination pages are deliberately not shown in the sitemap and shouldn’t be.
- Vendor / Types pages. Shopify creates a collection for each vendor and product type. These are low-quality pages you won’t want indexed anyway.
/collections/all. This is a default page, not something you’d want to rank, nor pagination on top of this collection.
In short, Shopify deserves credit for setting up sitemaps well out of the box. Any issues here are unlikely to be something to worry about, unless you’ve unintentionally created issues yourself.
Final Thoughts
While Shopify provides limited control over the sitemap, there’s at least two benefits:
Firstly, the sitemap is set up well out of the box with little customisation needed. All your pages will be added to this automatically, no need to ever consider it.
Secondly, while it takes a bit of development, it is possible to remove pages from the sitemap and create a new manual sitemap.
For most people though, besides submitting your sitemap to GSC, you can do nothing and be confident it’s all set up correctly.
Additional Reading
For more Shopify SEO advice, check out these articles: