{{ebook-chapter}}
After writing extensively about Shopify SEO on our blog, here's a full checklist of all the items we've covered.
Use this to quickly check your website for common issues.
But don't forget, every site is a little different and there's no way you'll cover everything in a simple checklist.
{{potential-cta}}
1. Fundamentals
1.1. Google Analytics Setup
Google Analytics is highly recommended for tracking traffic, sources (incl. search), sales/revenue, etc.
It also integrates with GSC to connect data from there.
You can also access a lot of this data inside your Shopify Dashboard, but for more detailed tracking and analysis I’d recommend GA. Especially if you plan to work with an ads or SEO agency, they’ll appreciate the existing setup and data.
1.2. Google Search Console Setup
Google Search Console (GSC) is a requirement for any website taking SEO seriously.
Registering your website with GSC will give you information about how Google is crawling your website, what terms you’re ranking for and getting traffic from, crawling and technical SEO issues, and more.
Read this guide from Google on how to add your website
Also if you’re doing this for the first time, make sure to submit your sitemap to GSC. Just click into the “Sitemaps” menu under “Index” and add the following URL: yourwebsite.com/sitemap.xml.
1.3. No errors in Google Search Console
Once GSC is setup, login and check for errors.
There could be some in the coverage section:
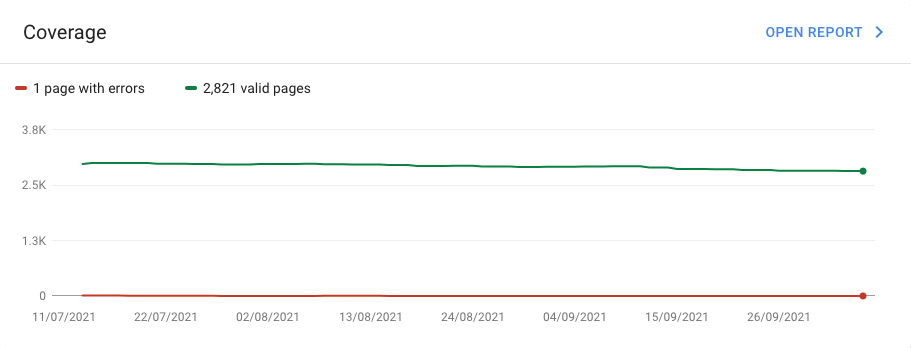
We can see this client has one error, which seems to be a 404 page that needs redirected.
They could also be in the experience section:
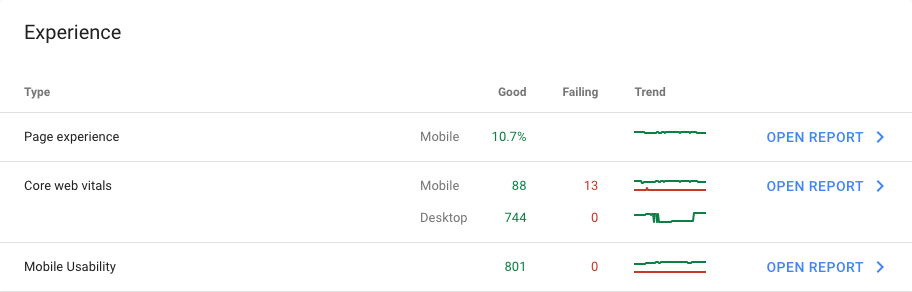
This website has some big core web vitals issues across 13 pages.
Or under Enhancements:
This is structured data issues, in this case the client had none.
Double check for any issues in these places and either fix them yourself or have a SEO/developer support.
1.4. Trust elements and pages
While not directly related to SEO, it’s highly important that your store has all the necessary trust signals. This will directly influence conversion rate (and time on site), which could possibly impact your SEO, and will also cover you long-term against Google’s E-A-T.
(E-A-T stands for expertise, authoritativeness, and trustworthiness. Something Google’s Quality Rates Guidelines are big on looking for)
This just means that you’ll want basics covered like:
- A clear about page with details of who runs this store
- Phone number that is easily accessible
- Delivery details
- Clear and understandable warranty/guarantee details
- Any additional trust signals like third-party reviews
2. Technical SEO
2.1. Internal Product Links
By default product URLs are:
/products/name-of-product
However, when accessed through a collection (i.e. category) page, this becomes:
/collections/name-of-category/products/name-of-product
The problem with this is it’s only for show, check any of these product pages for a canonical tag and you’ll see a bit of code telling robots the original page can be found at the /products/name-of-product page.
This means every single product in your store has internal links to the wrong URL. And while you could argue they're "canonicalised" therefore shouldn’t be an issue, this canonical tag serves little more than a recommendation and is often ignored by search engines.
This can lead to the same product being indexed in search engines multiple times, and a waste of crawl budget accessing the same product via multiple URLs.
Make sure to fix this by modifying your theme files, it's a simple fix.
2.2. Breadcrumbs
The problem with fixing internal product links is that it'll break the default breadcrumbs setup.
If you don't know what breadcrumbs are, they're the little links that help you navigate up (i.e. back) through pages prior to accessing this page.
Example here:

You should at minimum be using these on collection pages and product pages.
By default, Shopify uses the URL to dynamically insert breadcrumb links based on which collection you accessed this product through. This isn't ideal in the first place, but it'll be completely broken when you fix the internal product links.
The alternative is to manually set a breadcrumb for each product or even category. This can then be stored and accessed with a custom metafield, then used in the breadcrumb theme section.
Our Technical SEO for Shopify guide covers how to do this..
2.3. Product Tags
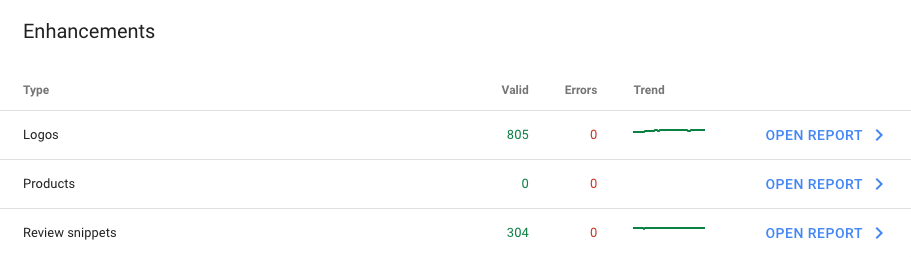
Within the Shopify ecosystem, tags are used for products as filters, as you’d commonly see in a typical eCommerce faceted navigation:
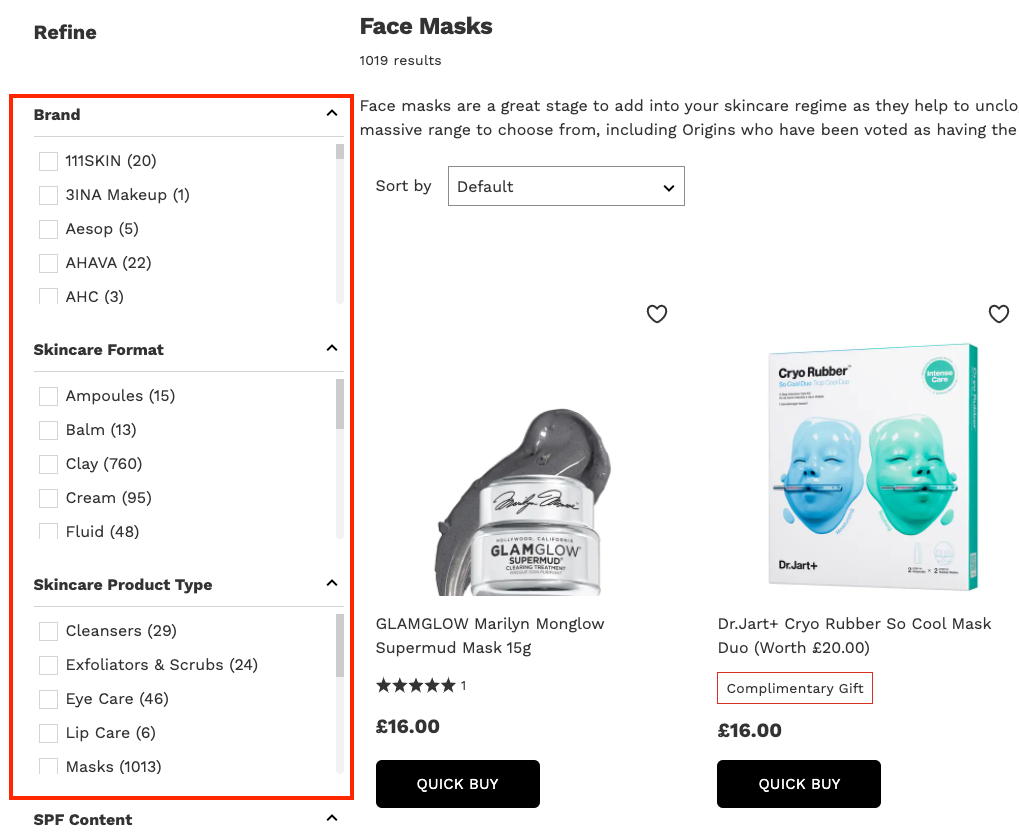
The problem with these tags is the thin content pages they create.
Let's say you have 3 size options: 125ml, 275ml, and 500ml. Then you tag all products across all your categories with whichever sizes are offered.
You'll now have tag pages automatically generated such as:
/collections/perfume/125ml
/collections/perfume/275ml
/collections/perfume/500ml
This is a great thing for SEO because it's possible these are keywords people are searching for. Maybe someone is specifically looking for 275ml perfume.
However, it's wasted on Shopify for two reasons:
- If you happen to write the tag with a space, it'll change the space to a "+" (i.e. 125ml+option) which is blocked by robots.txt by default
- The auto-generated tag page cannot be customised with unique H1, meta description, title tag, content, etc
This leads to a whole bunch of near-duplicate pages with the only difference being the title tag will say along the lines of:
Perfume: Tagged "125ml" - Brand
You can easily check if this is happening to your store with a clever Google search:
site:yourwebsite.com intitle:Tagged -inurl:tagged
If you're seeing this happen, it's something you should definitely fix.
You can fix this by either:
- Canonicalising these to the collection page
- Noindexing them
- Blocking at a Robots.txt level
Our Shopify Product Tags SEO guide explains how to do this.
2.4. Blog Tags
Similar to product tags, you can also use tags for blog posts to filter posts. These are commonly used on Shopify blogs to separate different blog post categories.
The problem, as with product tags, is this leads to many pages being created which you have no control or customisation over i.e. thin content.
You'll see this under URLs like:
/blogs/news/tagged/name-of-tag
Or with a quick Google search:
site:YOURWEBSITE.com inurl:tagged
Thankfully, fixing these is similarly easy by noindexing them or similarly blocking at a Robots.txt level.
You can find code snippets do that here.
2.5. Vendor Collections
Another thing that can lead to potentially 100+ thin content pages are what I call "vendor pages".
You can find these by doing a Google search for:
site:YOURWEBSITE.com inurl:collections/vendors
In most cases, it is a great idea to have a category page for each of your vendors (i.e. suppliers, brands, manufacturers), however Shopify's default implementation is fairly useless from an SEO perspective.
There's numerous reasons for this:
- The page URLs are defaulted to /collections/vendors?q=Name. Even ignoring SEO, these are not user friendly URLs.
- These pages are auto-generated, if you happen to have a vendor with 2 or more words the space between is replaced with a "+", which is blocked by Robots.txt. Meaning, if you have a supplier with 2+ words, search engines won't be able to access the page.
- Even if search engines can access the page, it can't be customised by default with content or SEO optimisation settings, therefore is practically useless.
I'd recommend blocking in your Robots.txt file, as explained in our Shopify Robots.txt guide.
2.6. Product Type Collections
Similar to vendor pages are product type pages. These can be find under a similar type of parameter URL:
/collections/types?q=Name
Or again by searching Google:
site:YOURWEBSITE.com inurl:collections/types
These again are automatically generated from the "type" field when creating your products in Shopify.
As with vendor pages, these have all the same issues as vendor pages and no upsides. Usually product types are literally the same as your categories (i.e. collection pages), therefore this provides no benefits.
The best fix is to disallow with Robots.txt. Copy our example Robots.txt file to do this.
2.7. All Collection
Every Shopify store by default as a "All" collection, which contains a list of all your products.
You can find it here:
https://YOURWEBSITE.com/collections/all
Usually this collection isn't being used, and especially when you have 1000+ products, this could lead to 40+ additional pages being crawled indexed when including all the pagination.
It's not a big deal, but as there's no intention of ranking them and products can be crawled through other collections, I'd noindex or block these from being crawled.
Our Robots.txt tutorial covers this.
2.8. Collections page
Another page many people don't realise exists is the default page containing a list of all your collections:
https://YOURWEBSITE.com/collections
For bigger stores, you'll likely have pagination on top of this which can create a bunch of additional pages too.
This is minimal though, so rarely a big deal, but I'd normally noindex these as they're unused.
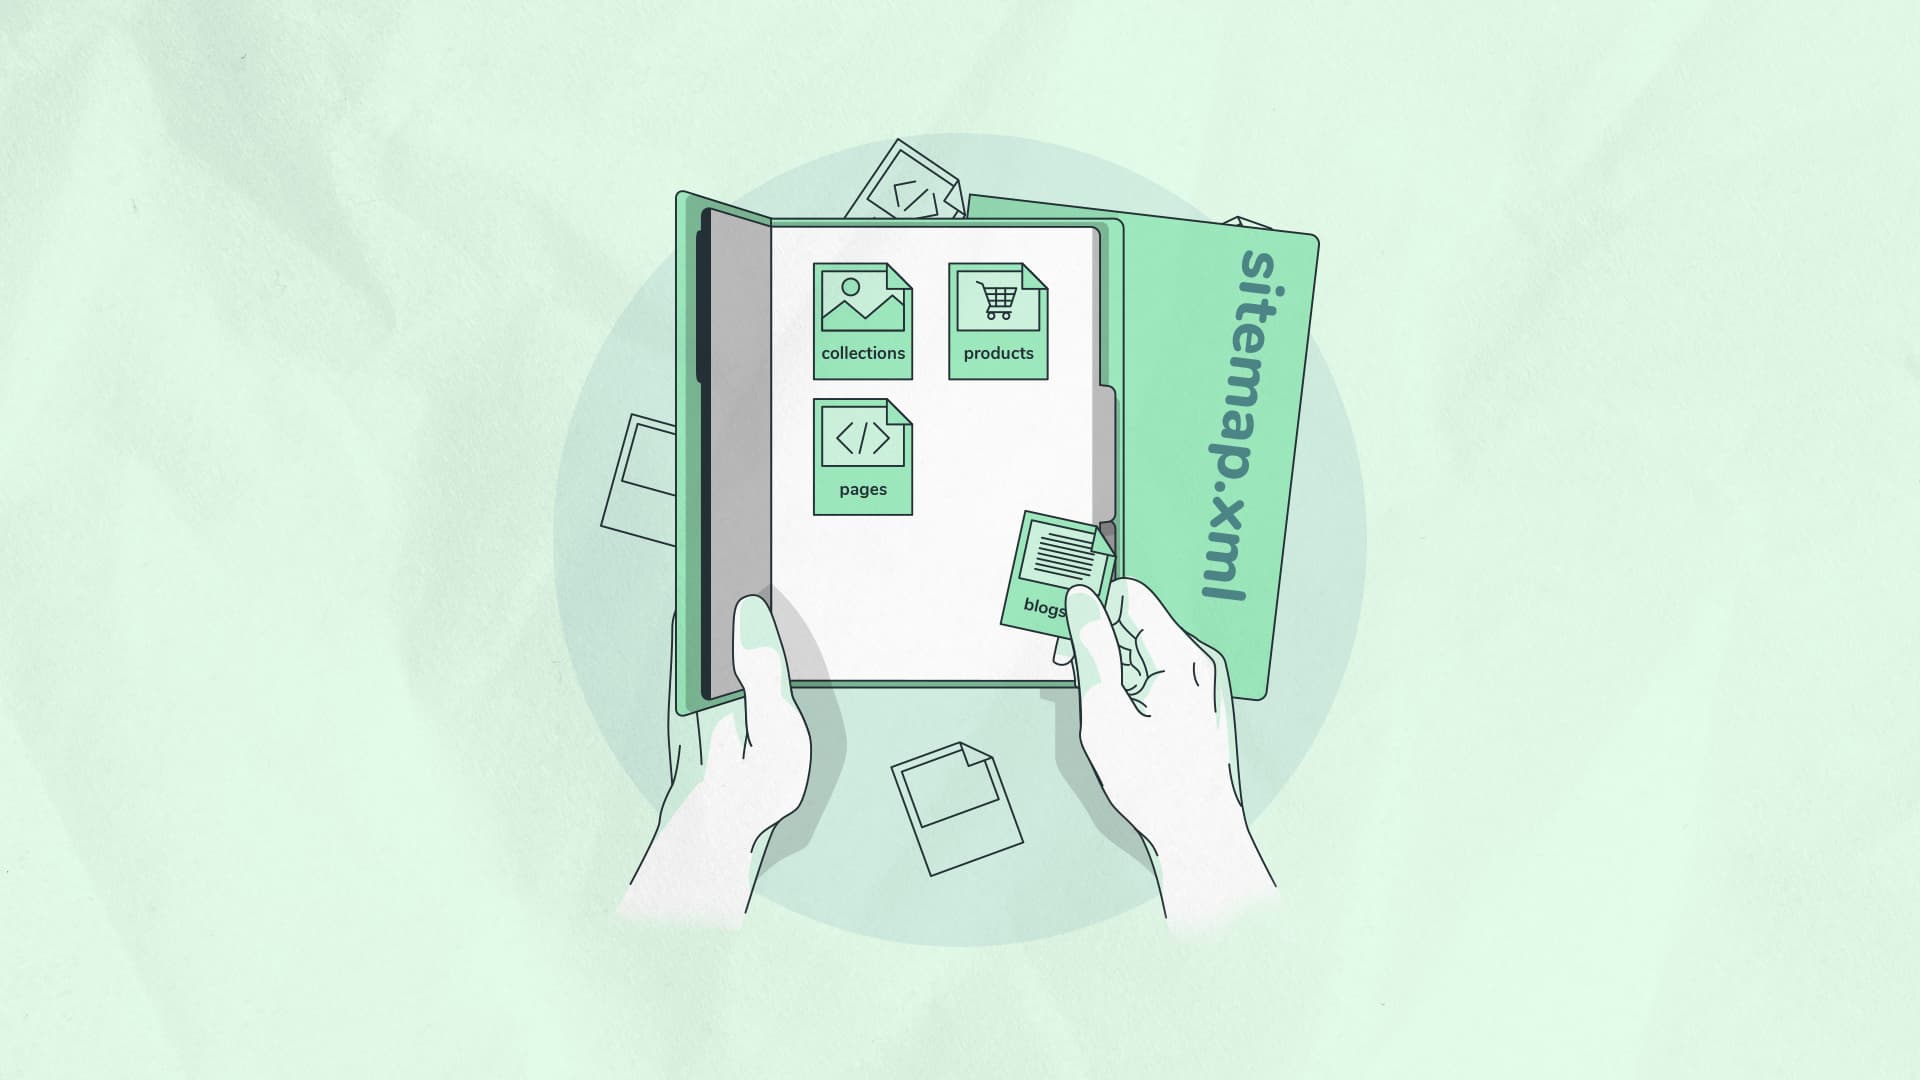
2.9. Noindexed pages in Sitemap
Here’s an odd one, if you've ever used any other CMS before, your instinct would be that if you set a page to canonical or noindex, it'd automatically remove it from the sitemap. Unfortunately that isn't the case.
Instead we need to manually remove from the sitemap, but there's bad news again, there's no simple option for doing that.
Oh, and we can't modify the sitemap out of the box. More fun.
Thankfully, there's a workaround with a little theme modification and hidden metafield, our Shopify XML Sitemap guide explains how.
3. Homepage
3.1. Title tag length
The title tag should in most cases be less than 60 characters long.
A common mistake I see is the theme automatically adding something to the title, which usually repeats the brand name (and possibly more) in every page including the homepage.
You can customise this under Online Store > Preferences for the homepage:
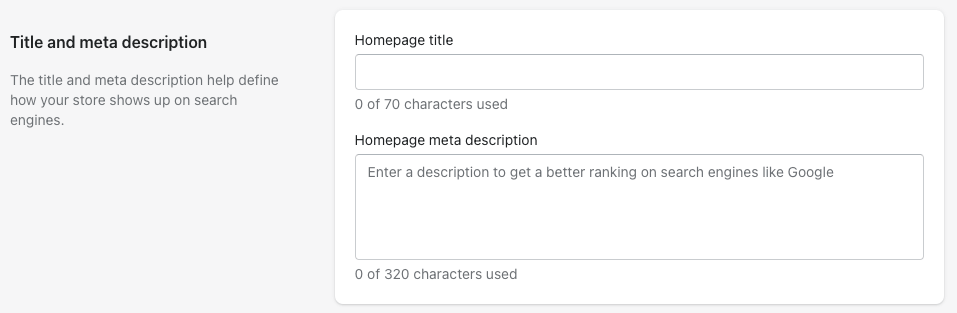
Though, I'd also do a quick check of the source code (visit your homepage > right click > view source code) and check the <title> tag to make sure there's nothing extra added.
Keep it under 60 characters to be safe and ensure it won't be cut off.
3.2. Title tag includes main keyword
Don't forget to include a keyword in your homepage title tag.
Usually this is your main general keyword.
For example if you're a gym clothing store, you'll have collections for leggings, gym shorts, gym tops, etc. But "gym clothing" is your overall topic which you'd target on the homepage.
3.3. Meta description exists and under 160 characters
Don't skip on the meta description, it's likely what people will see describing your page in the search engine results.
But also don't write too much, a max of 160 characters is around the sweet spot.
3.4. Meta description includes main keyword
While this won't really help rankings, including the keyword means it'll display bold in search engines which is useful for standing out.
3.5. Meta description optimised for CTR
What's the main purpose of the meta description? Driving clicks i.e. click-through rate.
You Can Capitalise Letters To Do This. Highlight features and benefits of your store or products. And add a call to action like Shop Now!
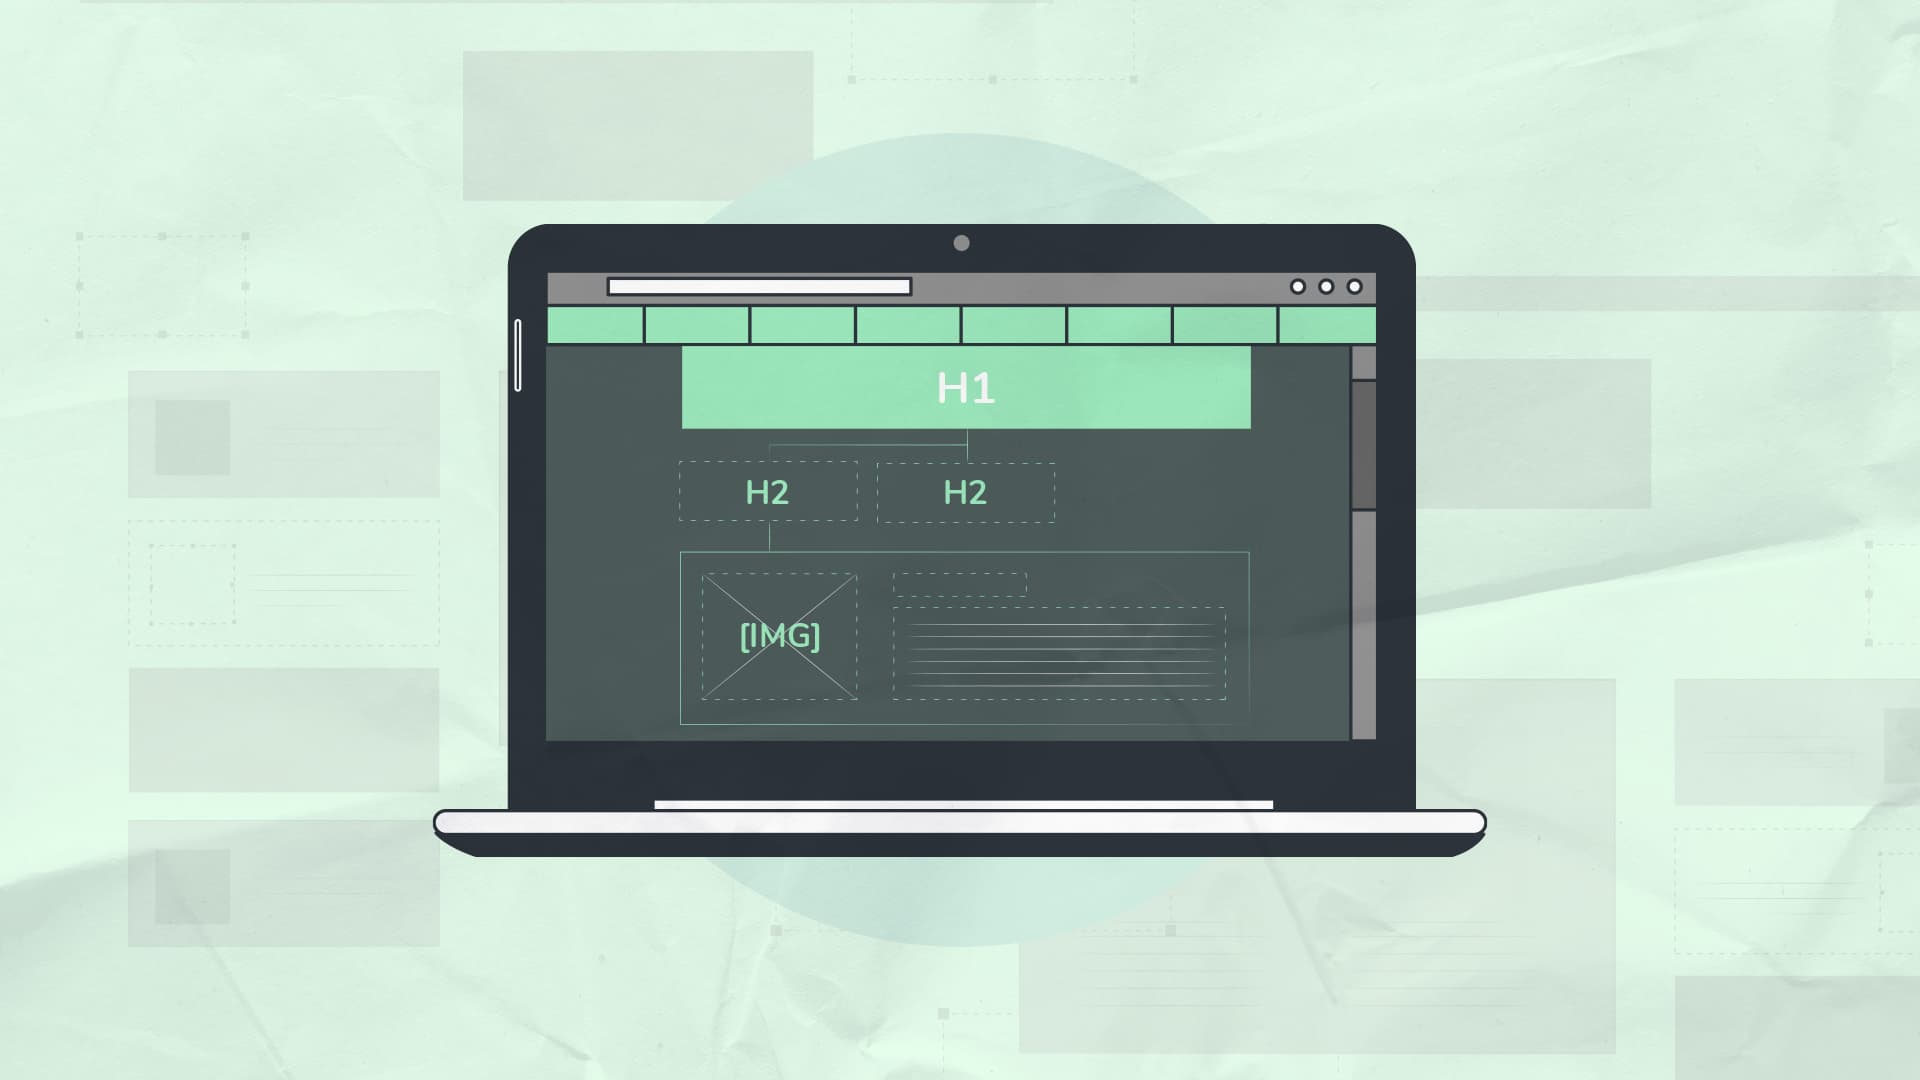
3.6. Only one H1 on the page
The Heading 1 is the main heading to tell readers what the page should be about. While it's not a major issue to have more than one, it's recommended to only have one.
A common issue with Shopify themes is setting the logo as the H1, which is essentially your brand name. This is especially common on the homepage.
Check the source code of your homepage and do a search for "<h1", if there's more than one, you should have a developer fix this.
{{potential-cta}}
3.7. H1 is keyword optimised
Your H1 should be keyword optimised to set the topic for the page. Include your main keyword especially.
That means avoiding something like "Welcome to Logeix!" as it's too generic and doesn't particularly help anyone.
What is your website about? Why are they here? What do they want to know?
This usually ties into your keyword anyway, you may write something like "The Biggest Selection of Gym Clothing in the UK".
3.8. Text on images (if applicable)
If you have a collection grid on your homepage like this:
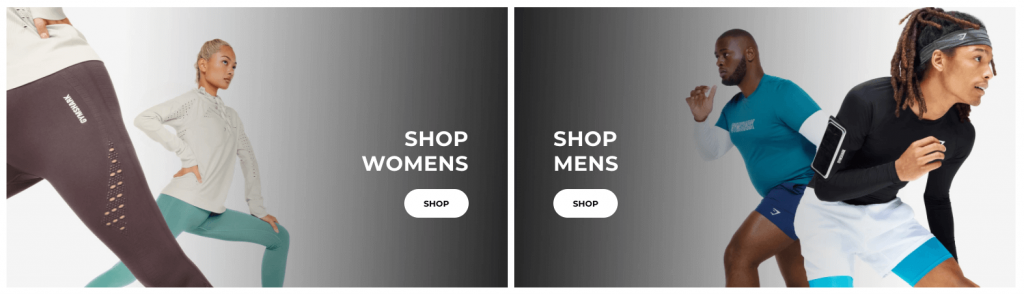
You want to make sure that this is actually text, not just an image containing text. The difference is in how easily search engines can read this.
In the above case, you want to actually have text in these boxes that says "Shop Womens" and "Shop Mens". This can either be visible and styled to look like it is (which is what they do in this example), or it can be hidden with CSS. The former option is most ideal.
4. Collections
4.1. Title tag length
Keep it under 60 characters, but also make the most of those 60 characters.
Many stores have a default title tag set like "Mens - Logeix". Make sure you're utilising the opportunity.
4.2. Title tag includes main keyword
These are arguably the most important pages on your store, make sure you're doing keyword research and including the main keyword in the title tag.
Preferably at the beginning.
4.3. Meta description exists and under 160 characters
Collection pages are likely to be the biggest bottom of funnel traffic drivers, so make sure you have a custom meta description for each page and it's 130-160 characters in length.
4.4. Meta description includes main keyword
As with the homepage, including your main keyword will help stand out as it'll appear in bold.
4.5. Meta description optimised for CTR
These collection pages will likely drive the most organic search traffic, make sure you're optimising for CTR.
Do you offer free shipping? Buy now, pay later? Is your collection the biggest? Or the cheapest? List these benefits of your store.
4.6. Only one H1 on the page
<!-- fs-richtext-ignore --> You should only have one <h1> element on the page, which will be the name of the collection.
Usually this will display above the products grid, though some display it below. Personally I'd prefer above.
But make sure that's it, common issues are logo also set as H1 and additional H1s being used in content descriptions below.
4.7. H1 is keyword optimised
It's very important that your H1 is optimised.
A common mistake eCommerce stores make is naming collections based on the context coming from the brand and website itself.
If you're on a clothing store, "Mens" is understandable to mean Mens Clothing for visitors.
For SEO though, you want to be explicit with detail or what we call keywords.
In the above case, it means ensuring your H1 includes the full keyword which would be "Mens Clothing".
4.8. Decent depth of content
It's important your collection pages have a decent depth of content. But also note that doesn't mean a 3,000 word essay pasted at the bottom, which we all know nobody will ever read.
In general, more quality content that matches the intent is better.
That means if I'm on a page looking to buy a new coffee machine, what do I want to know?
- What is the difference between these? Types, etc
- Why are these better than crappy instant coffees
- What extra stuff do I need?
And probably a bunch of other similar topics.
What I like to do is write a short description of the collection, then include an FAQ toggle list with all these questions in it and short to the point answers for each. For additional detail, you can link to blog posts if you have one.
4.9. Collections have at least 3 products
Another type of insufficient content is having too few products. This is easy to happen for larger stores with a lot of products and collections.
I like to check for this with a simple Google search:
site:YOURWEBSITE.com "This collection is empty" OR "There are no products"
This will find any empty ones, for collections with 1-2 products you'll have to manually look through them.
4.10. Internal links to subcategories or related categories
Internal linking is a powerful ranking factor, it's also hugely helpful to your visitors for navigating your website.
If you have any subcategories or closely related collections, I'd highly recommend linking to these.
Here's an example from a product category page for chocolate protein powders:
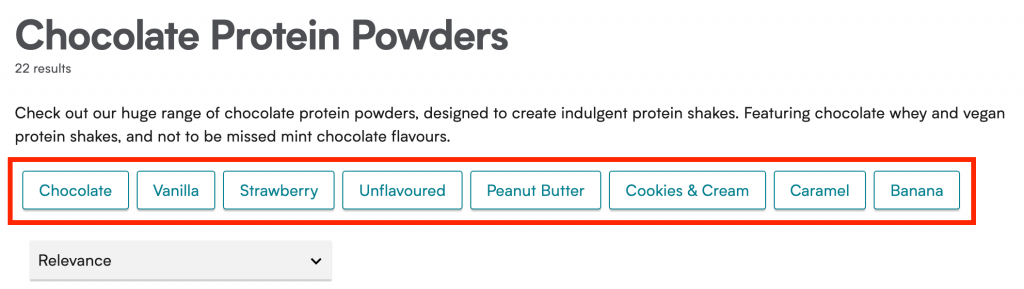
You can do this from the top of the page, if it's very helpful for users.
Or the bottom if it's additional pages that may be helpful, but not strictly related.
5. Products
5.1. Title tag length
As with other pages, keep this to 50-60 characters ideally.
In certain cases, this is literally impossibly as the product name is too long. In that case, just do the best you can to keep it short.
It's not that big of a deal if it goes over, but remember it's likely Google will cut the title and add an ellipses (...). This is fine, but may impact CTR, so usually I'd try my best to fit it in around 60 characters.
5.2. Title tag includes main keyword
If your product has a keyword, make sure to include it in the <title> tag.
In many cases, the keyword may simply be the product name. Possibly the product options too.
But in other cases, you can target very specific keywords on a product page that aren't targeted on a collection page.
5.3. Meta description exists and under 160 characters
With most stores having several hundred or thousands of products, a common issue is pages either completely missing a meta description.
Or if you crawl with a tool like SiteBulb, most products containing a 300+ character meta description. This is the equivalent of missing, as it's auto-filled based on the product description.
My suggestion is to create a template for each type of product, auto-fill the details, then bulk upload with an app like Matrixify.
Is this that important? Not until you're ranking first page. But it's pretty easy to do in bulk and will help once the page starts ranking.
5.4. Meta description includes main keyword
While you're writing these meta descriptions, be sure to include the main keyword as always.
In many cases this will be as simple as writing the product name.
5.5. Meta description optimised for CTR
To increase clickthrough rate on product pages you can:
- Show you actually have this product by clearly stating the name (main keyword usually)
- Mention features and benefits of this product
- Mention benefits of your store specifically (remember there's probably 100 other stores they can buy from)
- Include a call to action
5.6. Only one H1 on the page
As with any page, there should only be one H1 on the product page.
This should be the name of your product with optional additional keywords added.
5.7. H1 is keyword optimised
In most cases, your product pages won't target a keyword besides the product name, but if this page does then be sure to include that keyword in exact form in the H1.
5.8. Keywords are not cannibalising collection pages
This is an issue a lot of stores run into when they start doing SEO in-house.
Keyword cannibalisation is where multiple pages are attempting to rank for the same keyword(s), this can cause inconsistent rankings as they may rotate between the different pages.
This can easily happen if you've got say a collection named "Chocolate Protein Powder", but also a product named "Chocolate Protein Powder". Even if that product is actually more like "Chocolate Protein Powder - Whey".
Now this isn't a problem if the collection page is better optimised, with more content, FAQs, and better optimised <title> and <h1>. But just be careful of it, don't try to rank two pages for the same keywords.
5.9. Structured data
Run a test on multiple product pages with Google's Rich Results Testing tool.
Double check there's no issues, but also check to see what you've got setup.
I recommend:
- BreadcrumbList: Your breadcrumb should link back to the homepage along with any collections and sub-collections, make sure this is marked up with schema.
- Product: Describe the product details for search engines.
- Offer: Describe the product’s pricing options and stock.
- AggregateRating: Summarise the overall rating and reviews for this product.
5.10. Unique product descriptions
Make sure you're not copying product descriptions from suppliers or vendors, otherwise the original writers of the content will likely get priority over you in search engine rankings.
Instead you should be writing a unique description for every product.
That doesn't mean you can't copy anything, there's no penalty for this. I'd highly recommend copying all the product specifications in.
But add unique content also such as the description and product FAQs.
5.11. Decent depth of content
Generally speaking, the more quality content you have, the easier it'll be to rank the page. This also applies to product pages.
If you want to rank this product page, add a description that sells the product, list out the features/benefits, and add an FAQ section to help seal the deal.
The name of the game here is prioritisation.
You don't want to do this for thousands of products, or more likely, you have neither the time nor the budget to do so.
Therefore the important thing is to do proper keyword research and data analysis to identify which products to focus your efforts on.
5.12. Image alt text
Make sure all your product images have alt text. It's a simple thing to add, may help a little with SEO, but very important for accessibility users too.
6. Blog Posts
6.1. Title tag length
Blog posts allow a lot more flexibility with the H1, which if not optimised, may be used for your title tag by default.
Make sure you're keeping this under 60 characters, but ideally 50-60 to maximise the opportunity.
6.2. Title tag includes main keyword
Include the full keyword, which may be longer in this case.
For blog posts, it could be as simple as:
"Best Coffee Machine - Logeix"
But even then it's likely people searching for longer versions and modifiers, such as:
"What is the Best Coffee Machine in 2023? - Logeix"
6.3. Meta description exists and under 160 characters
Your blog content is likely to be the biggest organic traffic driver to your business if done right, so it's important you're using an optimised meta description.
Keep this in the 130-160 characters range.
6.4. Meta description includes main keyword
Include the main keyword so it stands out in bold and helps click-through rate.
6.5. Meta description optimised for CTR
Write your meta description as an ad to create interest and drive clicks.
Here's an example from our blog:
Is blogging on Shopify worth it? And if so, how do you use it to increase traffic and sales? Here's a full guide to starting and growing your Shopify blog.
There's no call to action here, but it includes the main keyword and is written to create interest and show we have the content they're looking for.
6.6. Only one H1 on the page
The H1 should be the title of the blog post. Make sure you're not using it for the logo or any subheadings.
6.7. H1 is keyword optimised
Include the main keyword in the H1 and optionally secondary keywords. I'd usually put this at the beginning.
For example our main keyword on our Blogging on Shopify post has the keyword at the beginning with secondary keywords and context for readers added after:
Blogging on Shopify: How To Do It For SEO Traffic
6.8. Good usage of subheadings
Include lots of subheadings (H2's and H3's) within your content to dive deeper into the topic.
I'd highly recommend doing this in 3 ways:
- Look at your competitors for direct inspiration
- Look at Google "People Also Ask" for this keyword
- Look at Google's recommended searches at the bottom of this SERP
This will give you several ideas for how to expand this content, from topics to cover to FAQs to add.
Bonus Tip: Don't forget to wrap those FAQs in FAQPage schema.
6.9. Internal links to collections
The main purpose of blog posts is to drive traffic back to your collections and products.
One way is to link to your collection pages, which also has massive SEO benefits. Internal linking is a powerful ranking factor.
Make sure you're always linking to relevant collections to the blog post topic. I'd suggest linking to 1-4 of them, if you can.
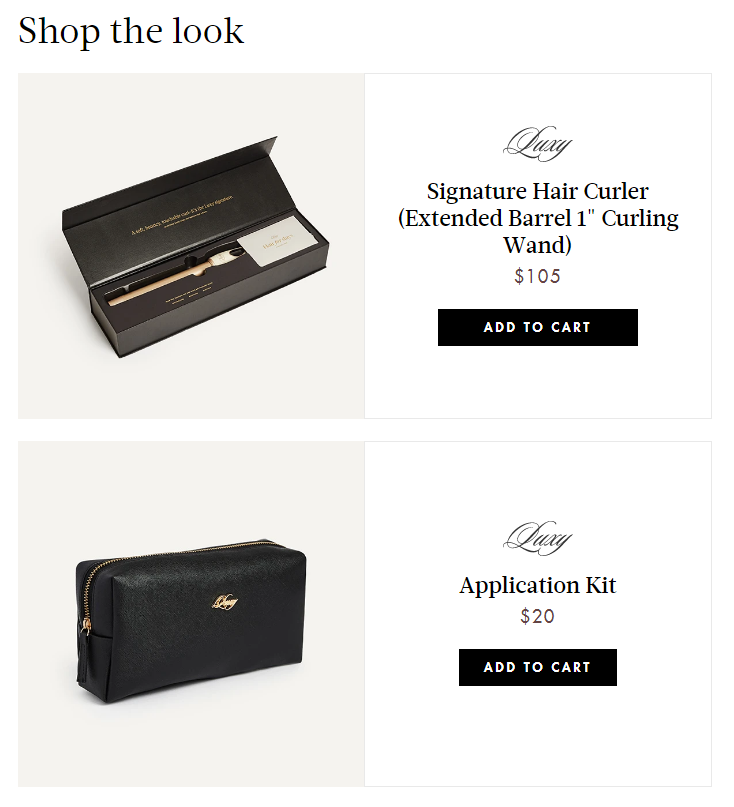
6.10. Related products
Take the opportunity to recommend some related products in your post, unless you're building an email list, this will be your main call to action.
Here's an example from Luxy:
6.11. Image alt text
Blog posts are an easy place to forget to add image alt text, I'm very guilty of this myself.
But I'd suggest setting an alt text for all the images in your blog post, this again helps for SEO and for accessibility users.
Don't over-optimise these with keywords, just describe the image and what it shows.
6.12. Keywords are not cannibalising collection pages
Similar to product pages, a common issue is that webmasters will create a new blog post that directly competes with a collection page.
This is called Keyword Cannibalisation, where more than one page attempts to rank for the same keyword.
A relevant example would be if our agency website here had:
- A service page attempting to rank for "Shopify SEO" to sell our services
- A blog post attempting to rank for "Shopify SEO" to teach our process
These two pages are now targeting the exact same keyword, which makes it difficult or inconsistent to rank.
But do some research here because in this case "Shopify SEO Services" is a separate keyword and intent altogether, so we can still keep both of these pages if we make that distinction.
7. Site Speed Optimisation
7.1. Image file format
Different file formats have different benefits in terms of quality and file size therefore loading time.
As a general rule, product images should be in WebP or JPEG format for the lowest file size as quality isn’t as important. But will still look great if compressed well.
For hero images and other images with text inside them, you’re usually going to use a lossless format like PNG, though again WebP is suitable here.
And for your logo and theme icons, make sure you’re using SVG format for high quality and scalable images.
The main consideration here is both quality and size.
7.2. Compressing images
Choosing the right file format is only part of the battle, next you need to compress your images.
I did a quick test of 3 random images to see how much smaller the files were after compression:

You can see they ranged from 49-77% smaller files, which is a massive reduction.
Thankfully, this is extremely easy to do with a Shopify App, you can automate the entire process.
Just install a compression app like Crush.pics and you’re off to the races.
Or if you have any difficulties or want to do it manually, you can use a free website like TinyPNG.
7.3. Correctly sized images
The process here is in two parts:
- Resize images on upload to the max size needed (this may be 2x the dimensions shown to cover for retina displays)
- Use srcset to selectively show different image sizes
Read this guide for using srcset.
7.4. Lazy loading
Typically when a page is opened, every script, image, and resource is loaded immediately on load to ensure things are displayed correctly. But is that always necessary?
Collection pages, for example, could easily have 24+ product images, but how many of them are visible even after the page loads. Many are further down the page and require scrolling to even see.
Lazy loading is where you defer loading of images until they’re actively visible.
This could be not loading images until they’re almost visible on the screen. Or only loading the first 2 product images in a carousel, then loading the rest as you click.
Instructions for setting this up here.
7.5. Uninstalled unused apps
Make sure to uninstall any apps you're not using, including removing any left over code on your site.
Best to have a developer review and implement this.
7.6. Conditionally loading app scripts
By default, most app scripts are added to your theme.liquid file so they load across every page – this is convenient. But it’s also slow.
It’s the equivalent of carrying an umbrella with you 24/7 for the off-chance it may rain – some day. Wouldn’t it be more effective to only have an umbrella when it rains?
With apps this can be achieved with conditional loading.
In short, if a condition is met, the app script is loaded.
7.7. Minified JS and CSS
Minifying refers to the process of eliminating styling from CSS and JS files, as it's unnecessary for robots, which will in turn reduce the size of the file.
For non-developers, there's apps that can minify these files for you such as File Optimizer.
Otherwise you can do this manually with JSCompress, and let Shopify do it for you automatically with CSS files by turning them to .scss.css format.
7.8. Async/defer non-essential scripts
If you have scripts that aren’t essential for the initial page load, you can defer them so they’re loaded last, or load is asynchronously so the full script is loaded in the background before being executed.
This diagram explains the differences in how these are loaded:

This is something you should have a developer implement for it, but it’s relatively simple again by adding defer or async to your script tags.
7.9. Resource hints / preloading
Resource hints including preload, prefetch, dns-prefetch, or preconnect; are used to optimise the loading of important resources.
Each has a different purpose as follows:
- Preload: Fetch a critical resource for the current page before the page begins rendering
- Prefetch: Fetch resources not needed on the current page, but likely needed on next page e.g. stylesheet
- DNS-Prefetch: Reduces latency by performing a DNS lookup ahead of time to a domain you will load resources from. Note this is performed after the current page has loaded.
- Preconnect: For when you plan to fetch content from a specific domain within 10 seconds. Similar to DNS-Prefetch but also does TCP handshake and TLS negotiation.
Examples of how to implement this here.
8. Backlinks
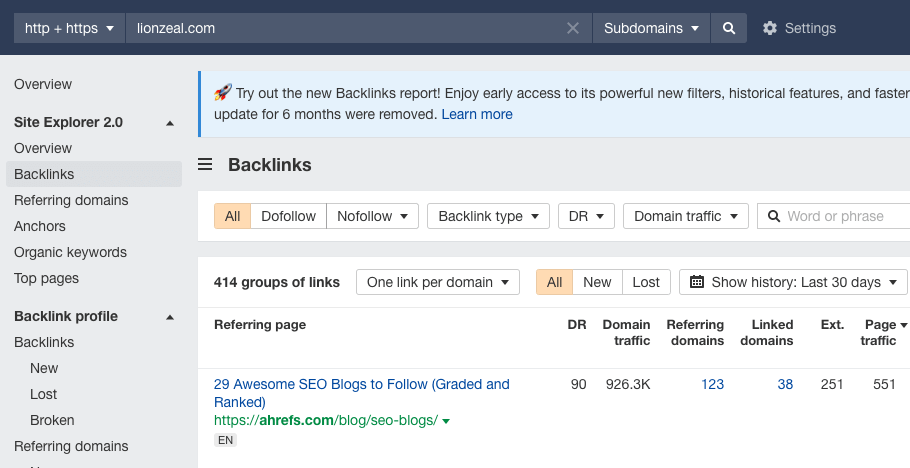
8.1. No spammy backlinks
Check the backlink profile in a tool like Ahrefs.
You can do that with their Site Explorer tool, then navigating to the Backlinks section:
I'd suggest looking for:
- Lots of foreign links (foreign domains or anchor text)
- Blog comments, forum links, profile links, or other easy to mass-built and replicate links
- Links from low quality sites (low quality / not much content, spammy looking, PBNs, etc)
This takes a bit of experience to understand the quality of a link, but if it seems really spammy, it probably is.
Some of these will happen naturally, so don't freak out. But it's worth checking for, then probably having an SEO review it for you to decide if action needs taken.
8.2. Anchor text are not over-optimised
Another thing you'll want to look at is the backlink anchor text, this is the text people use when linking to your website.
This is another place you can find spam, but can also reveal if your backlink profile has been over-optimised before.
Navigate to the Anchor section in Ahrefs site explorer:

Now look through this list and check what you see, the most common links should be your brand name and URL.
If on the other hand you're seeing keywords here with a lot of referring domains, it's possible you're over-optimised.
For example, let's say you have 300 referring domains in total and 50 of them are "gym clothes", this is a massive case of over-optimisation.
Be careful of using keywords too often, and the same keyword repeatedly, as the anchor text when building links.
Final Thoughts
There you have it, that's practically everything we've covered in this 16-part guide to Shopify SEO.
If you'd like to dive deeper into any of these areas, I'd suggest the following blog posts:
For additional help, why not get in touch with our team?
{{potential-cta}}